Checklists in SimpliHost give you a structured way to define exactly what needs to happen at a property and in what order. You can group tasks by category, attach reference photos so your team knows what to look for, require photo proof before an item can be marked complete, and link checklist items directly to maintenance records. Whether you are onboarding a new cleaner or standardizing your inspection process, checklists help you set clear expectations and reduce follow-up.
You want to standardize your cleaning, inspection, or pet-policy process across properties
You are onboarding a new cleaner or team member and need to give them step-by-step guidance
You want visual reference photos embedded in tasks so nothing is missed
You need photo proof that specific items were completed before a task can be marked done
You want checklist completions to automatically update maintenance records on a property
You manage multiple properties or property groups and need checklists that apply to the right ones
You must have permission to create and manage checklists in your SimpliHost account
Properties or property groups must already be set up before you assign a checklist to them
Reference images should be ready to upload if you plan to attach them to checklist items
Maintenance items must already exist on a property before you can link a checklist item to them
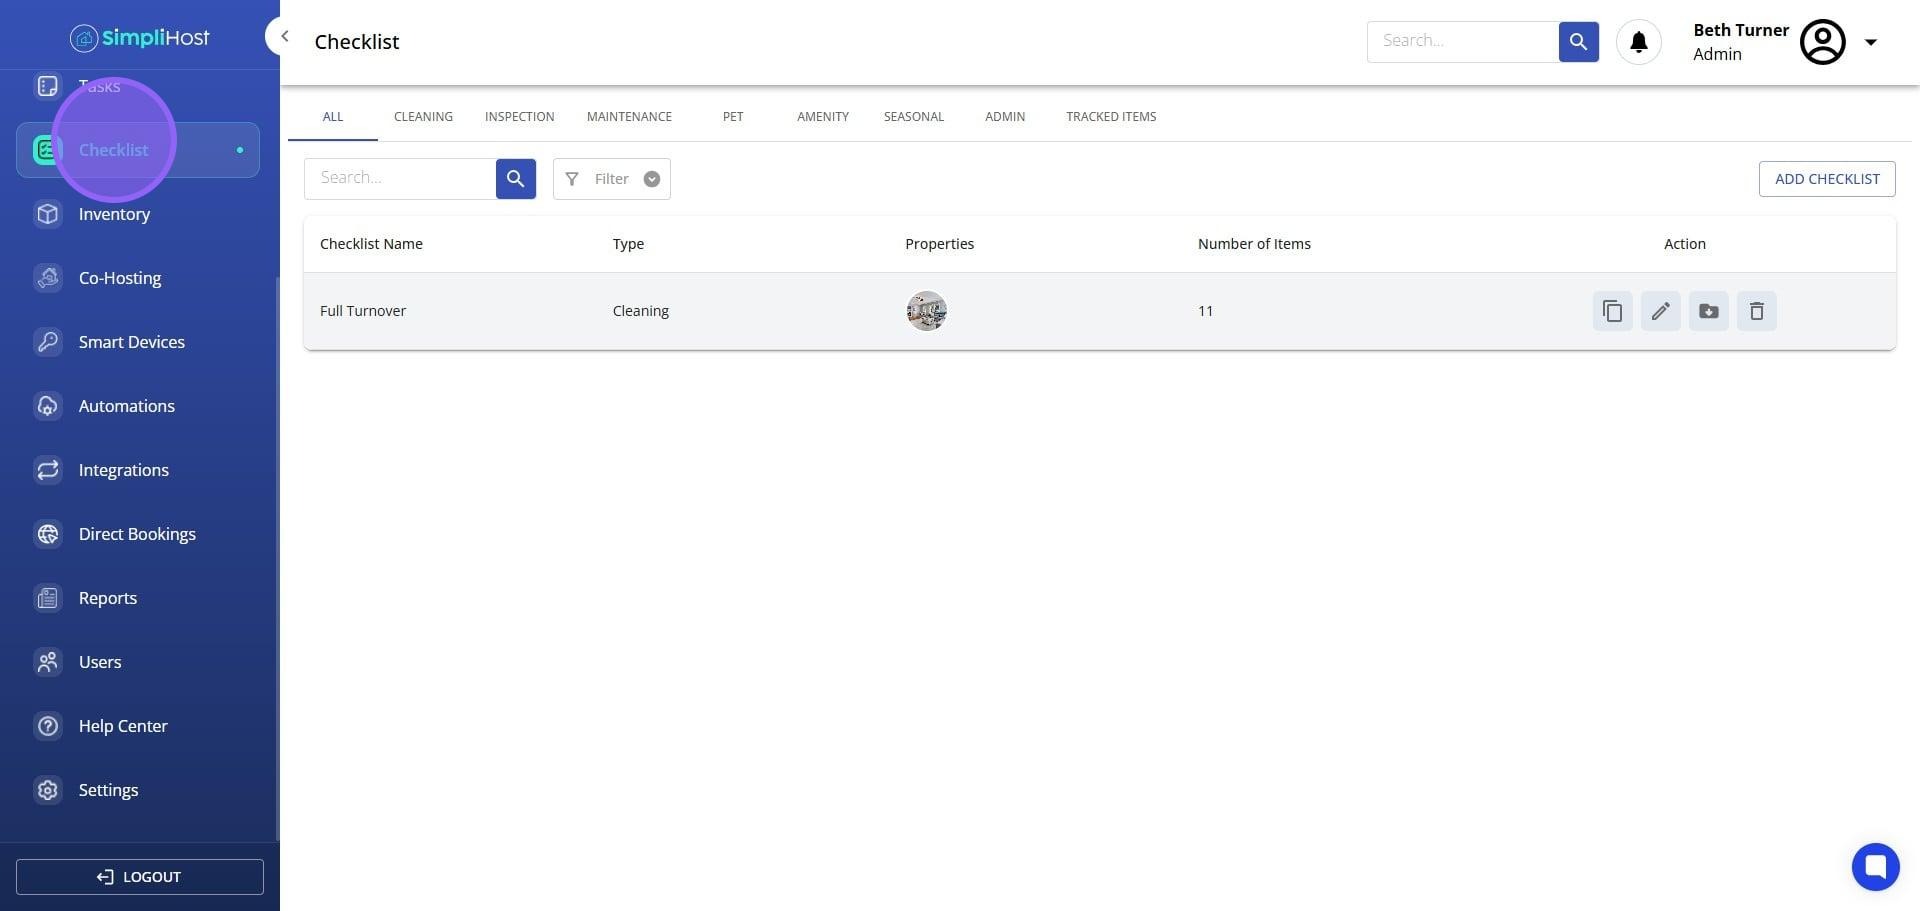
Click Checklists in the main navigation.
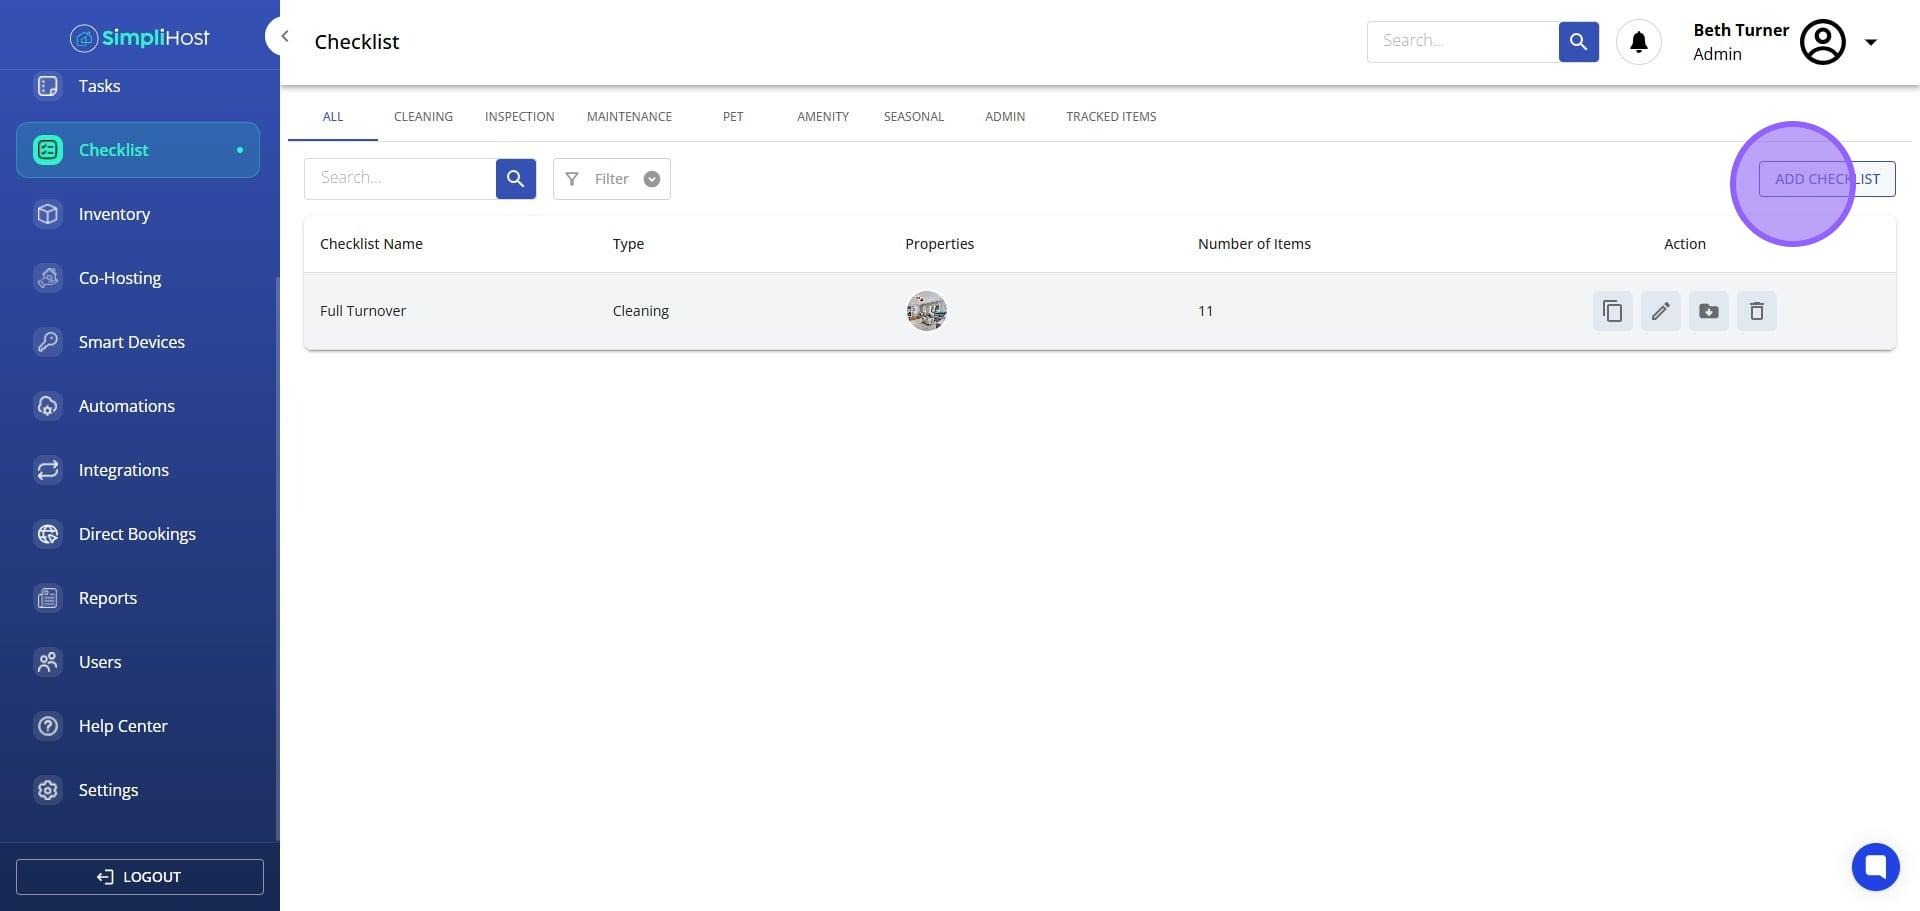
Click Add Checklist.
Enter a name for your checklist in the Checklist Name field.
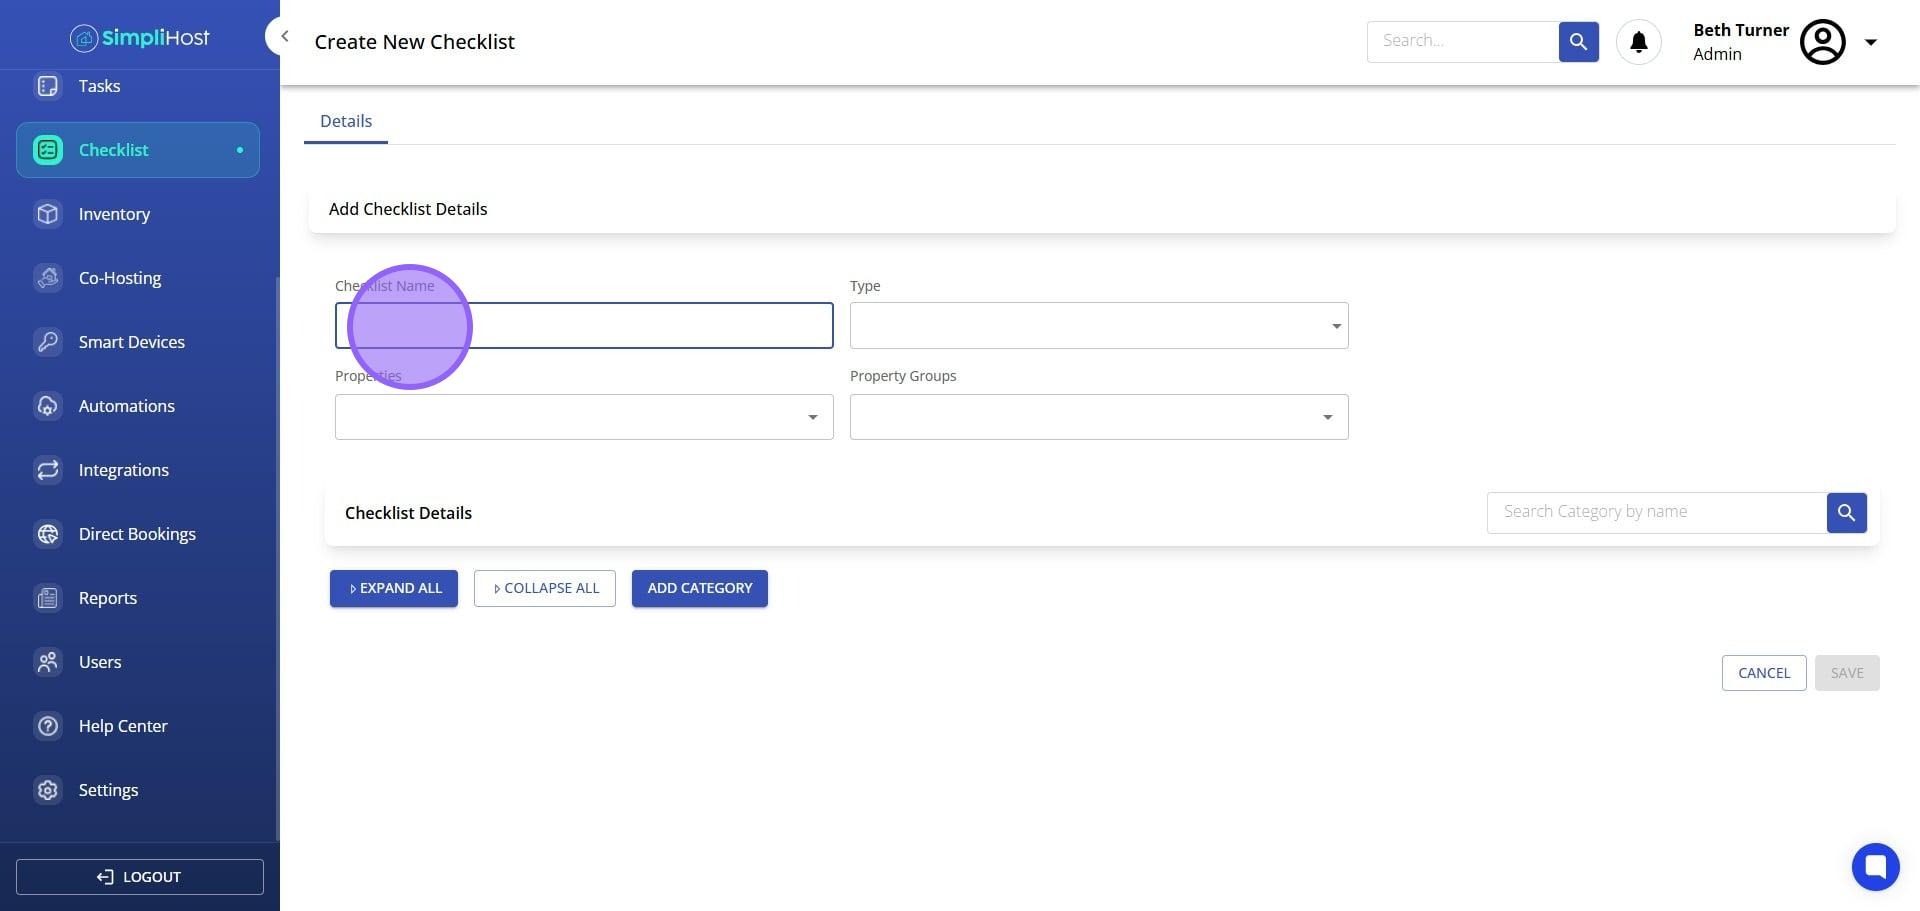
Select the appropriate checklist type (Cleaning, Inspection, Pet, or other available types).
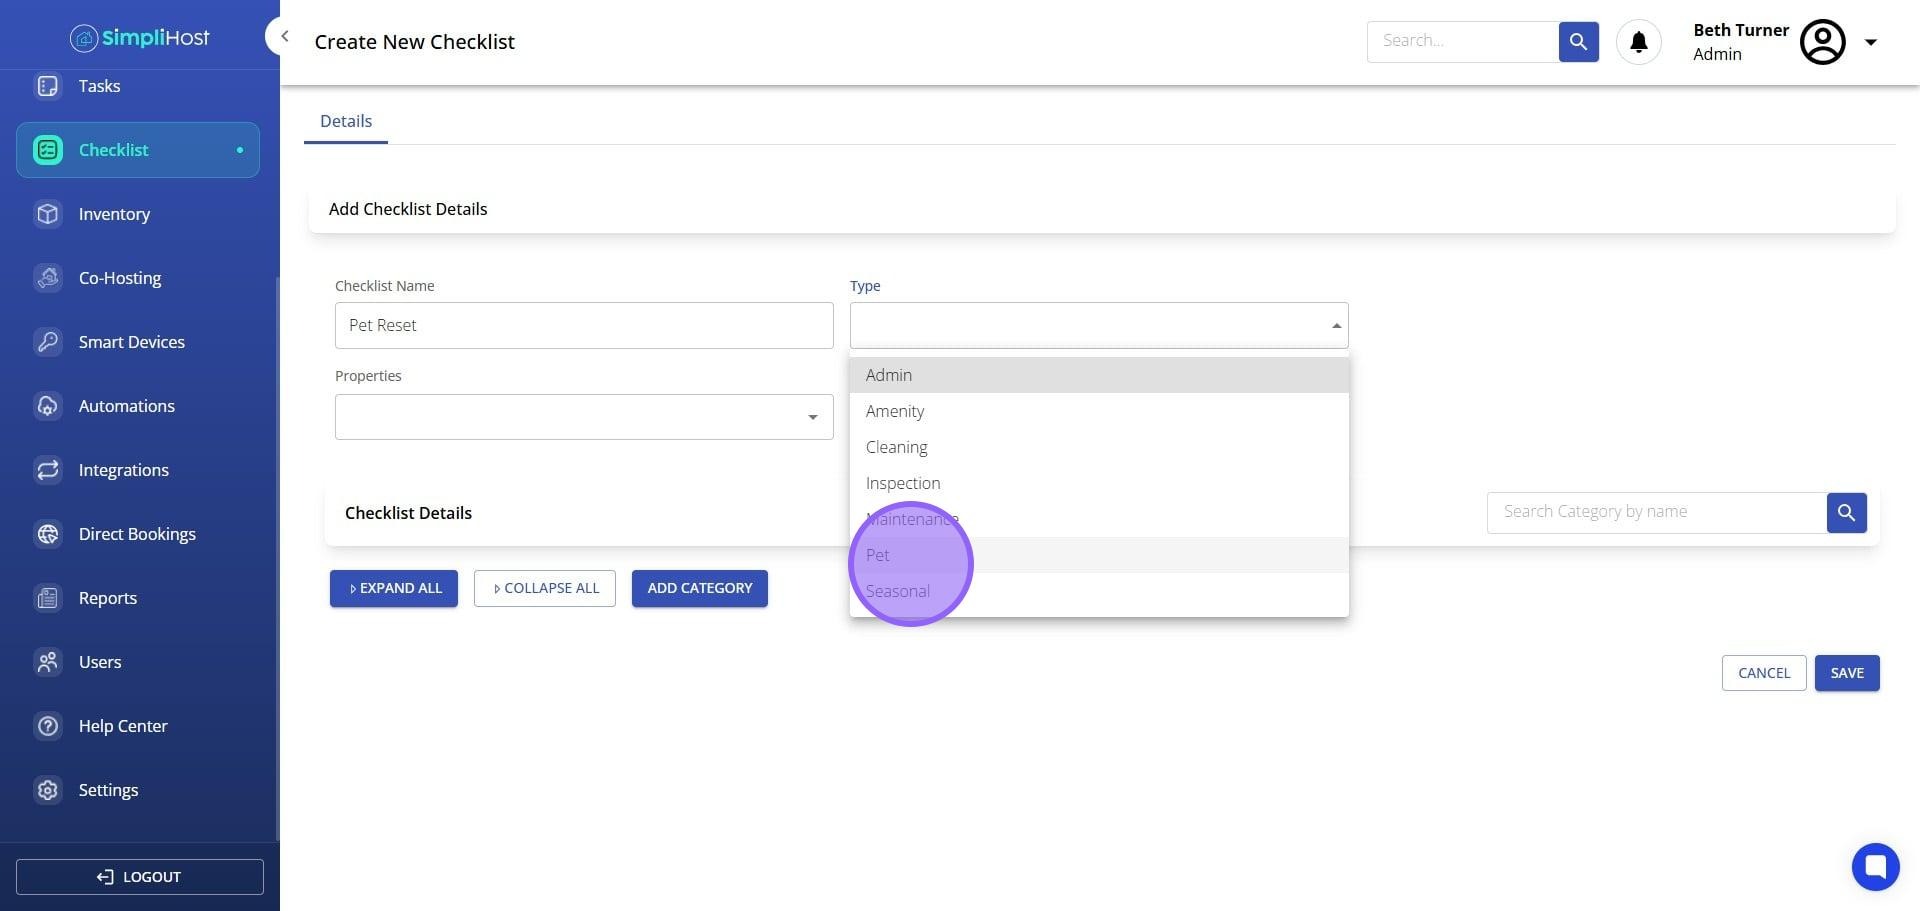
Select the specific properties or property group this checklist applies to.
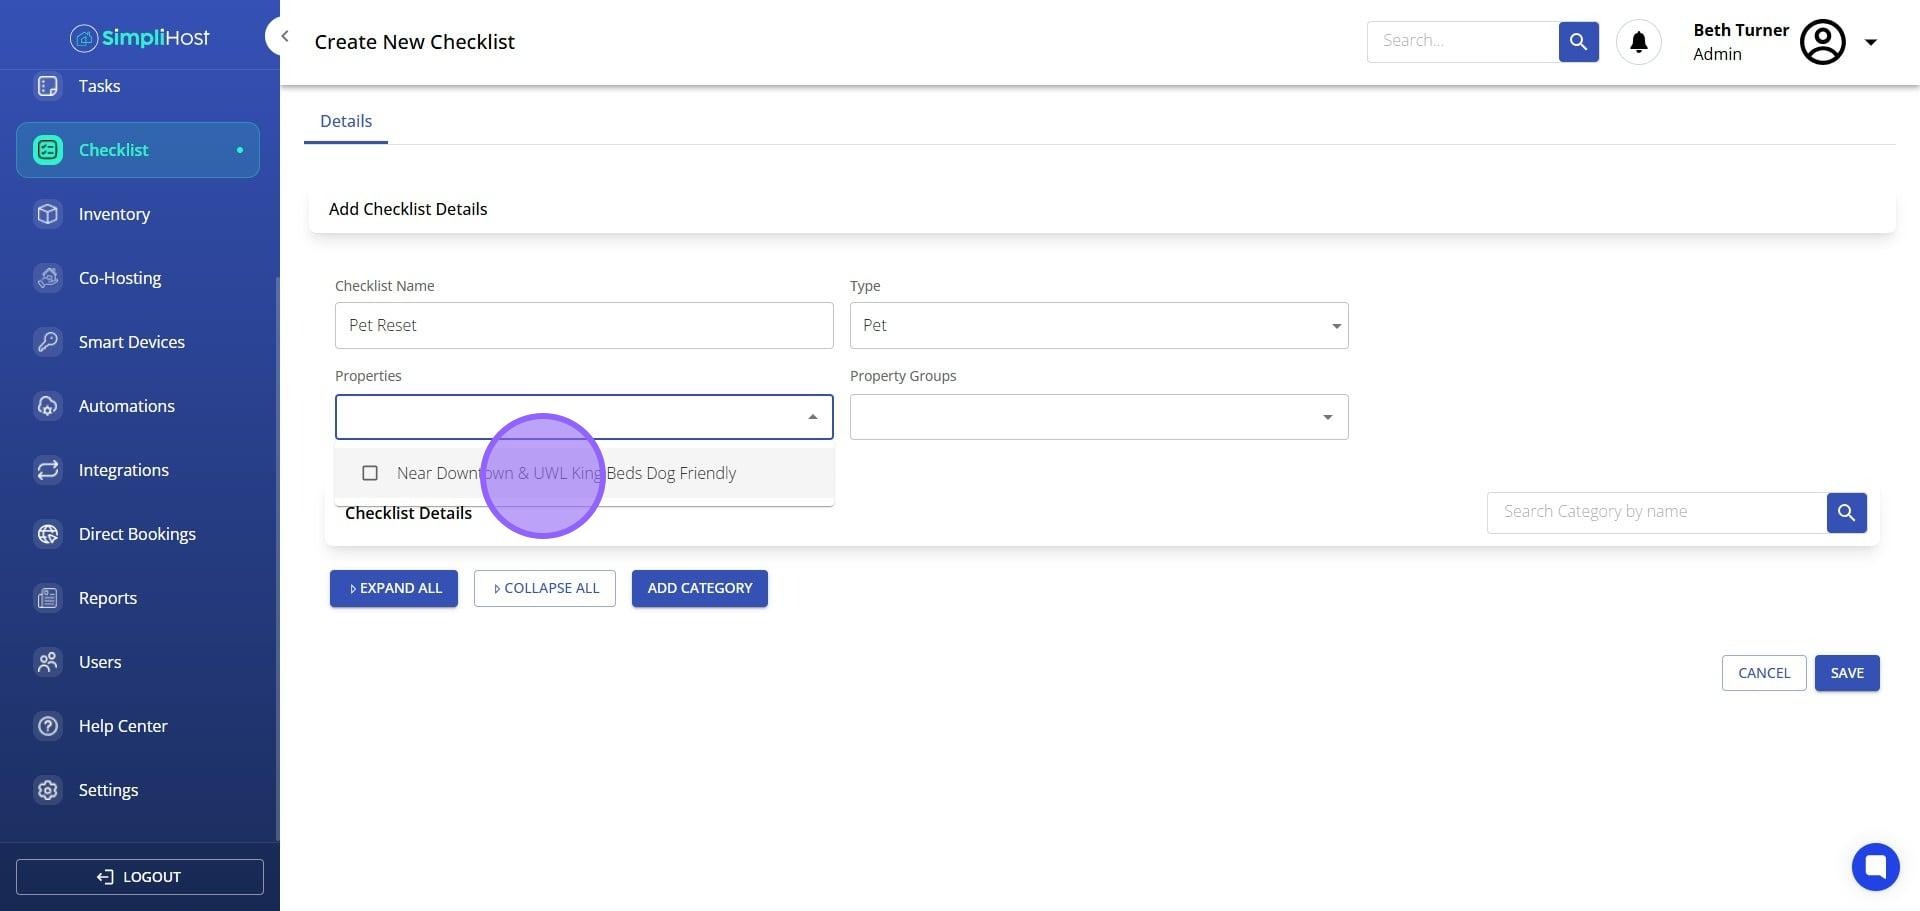
Click Add Category.
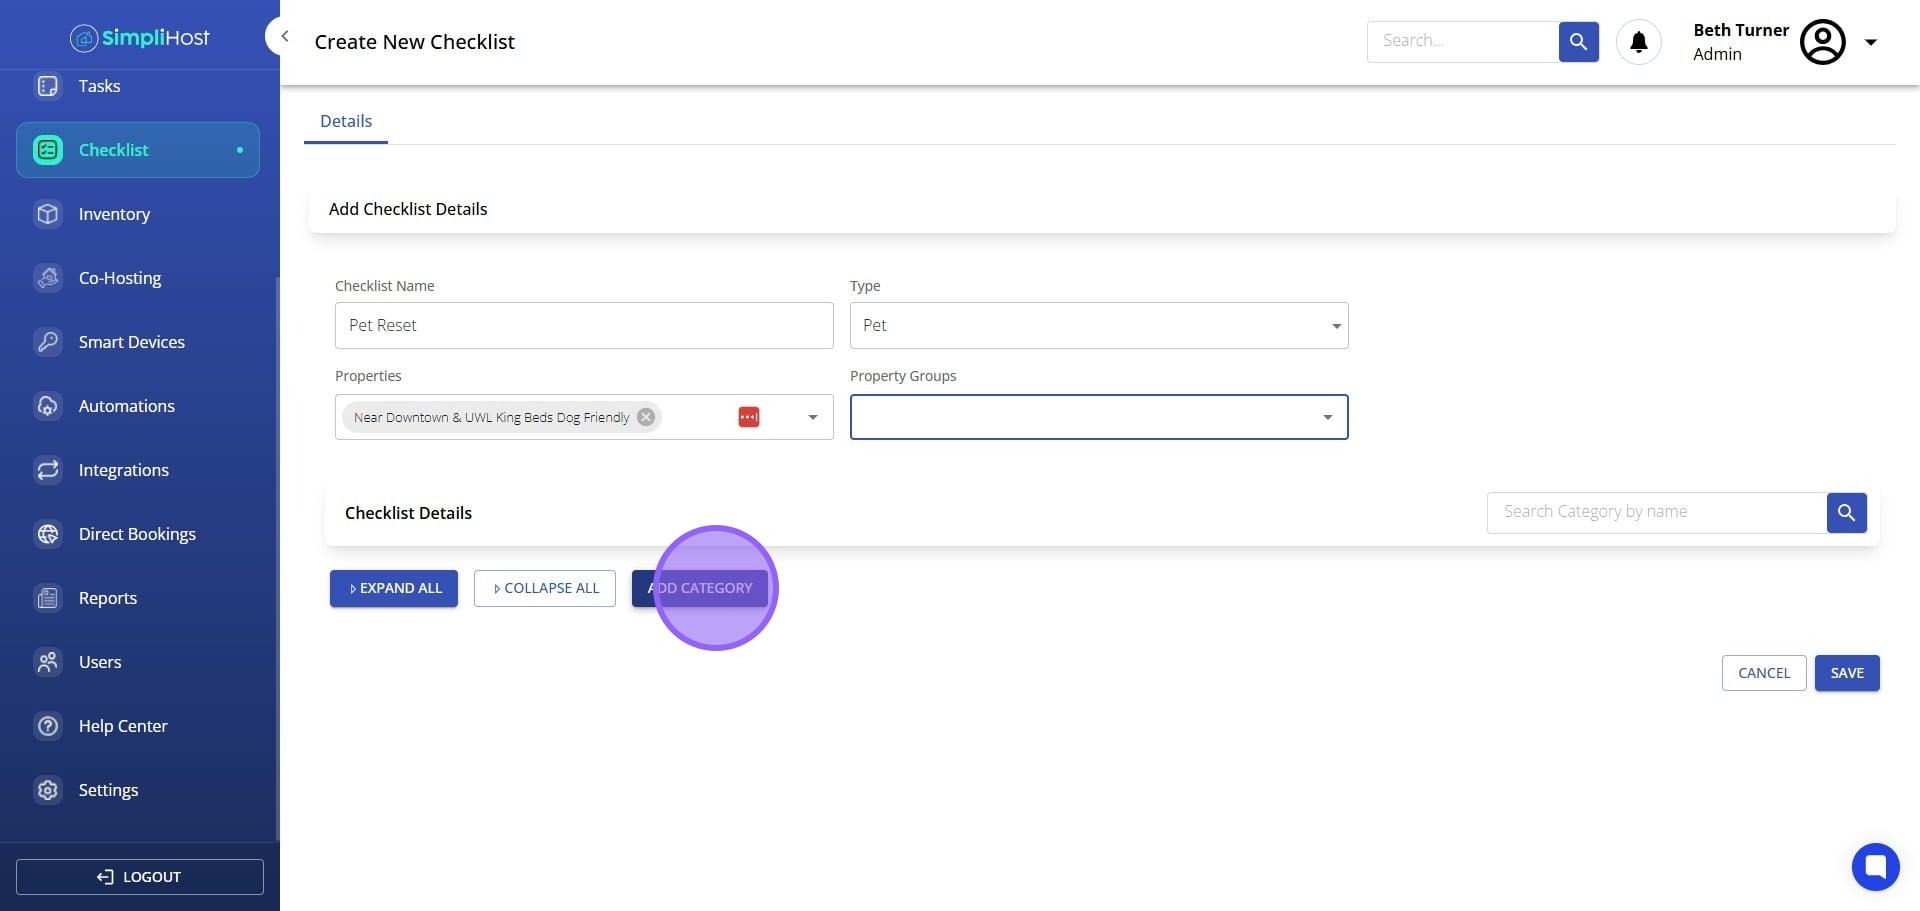
Select an existing category from the list
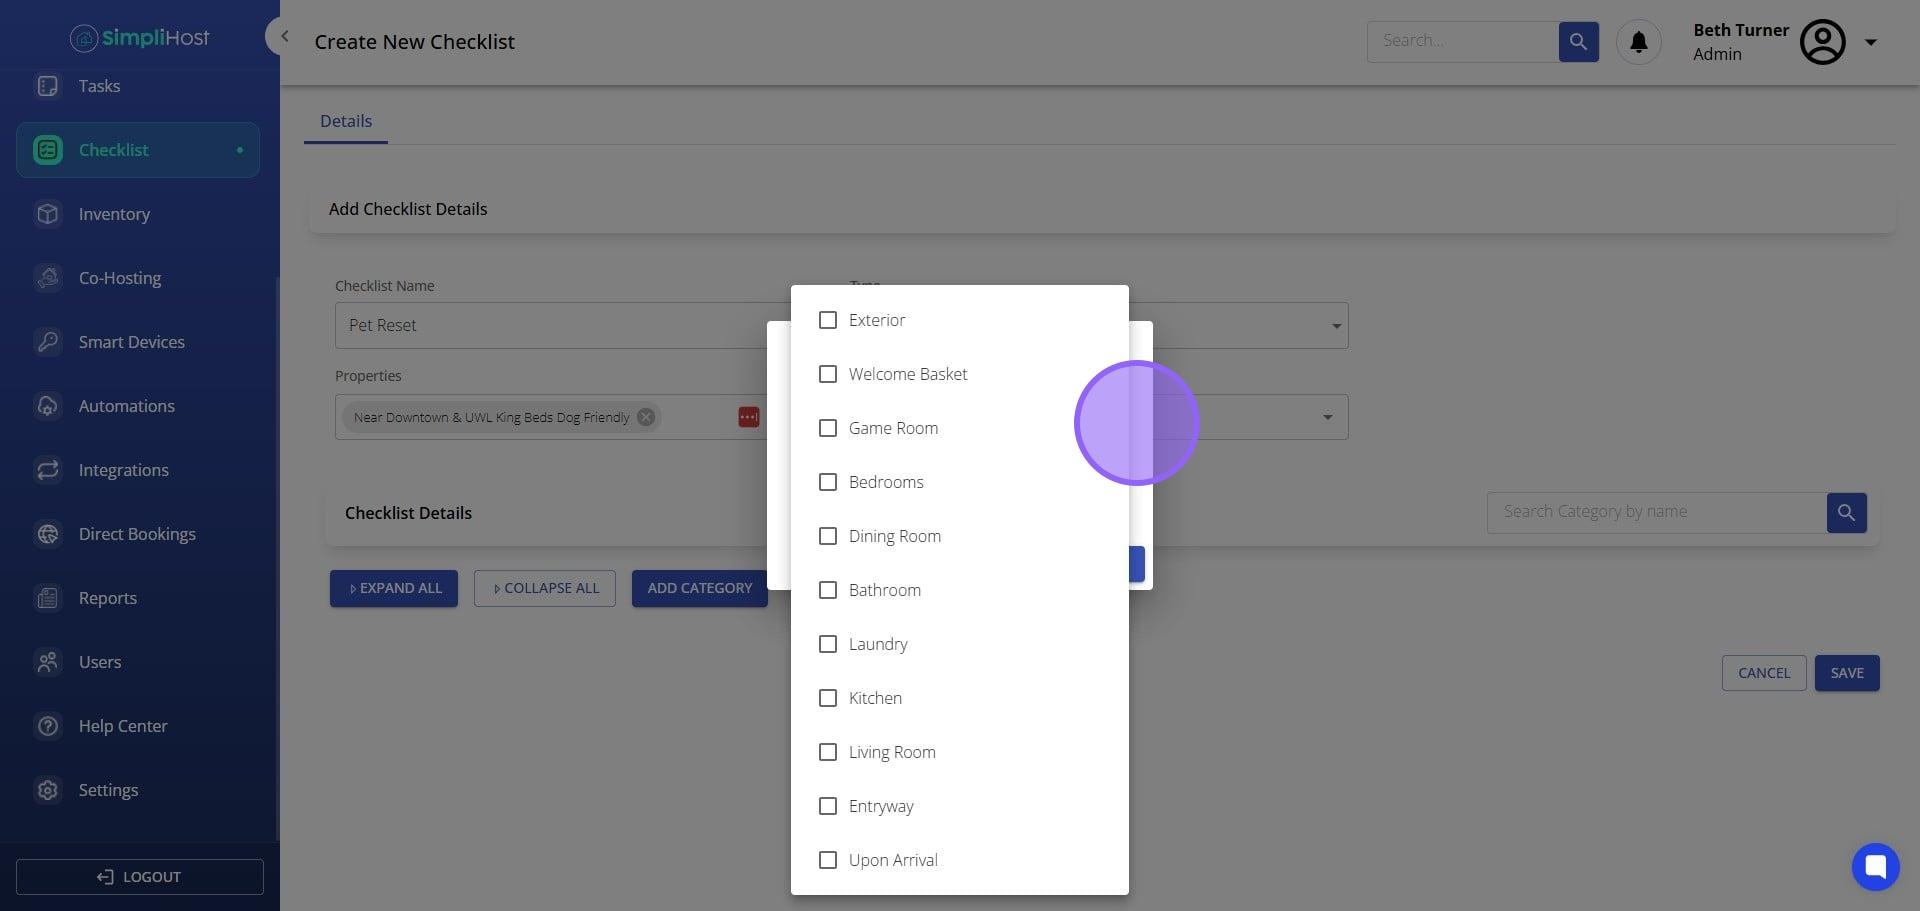
Click Create New if your category does not yet exist.
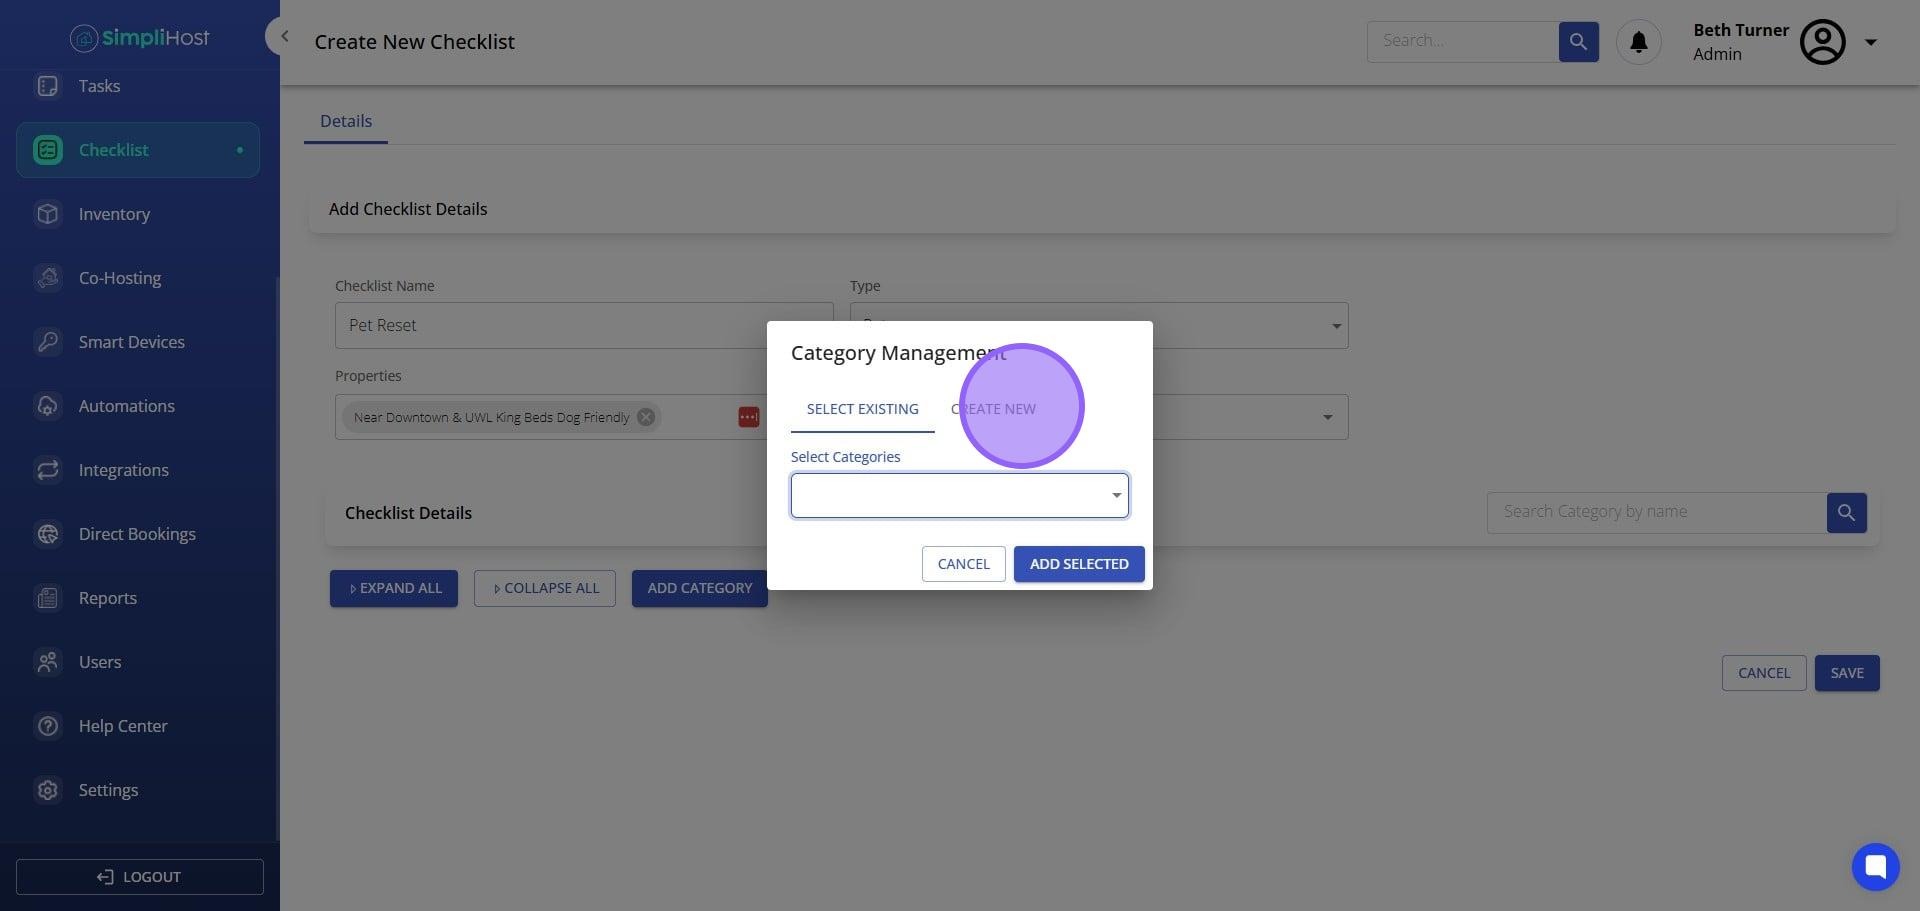
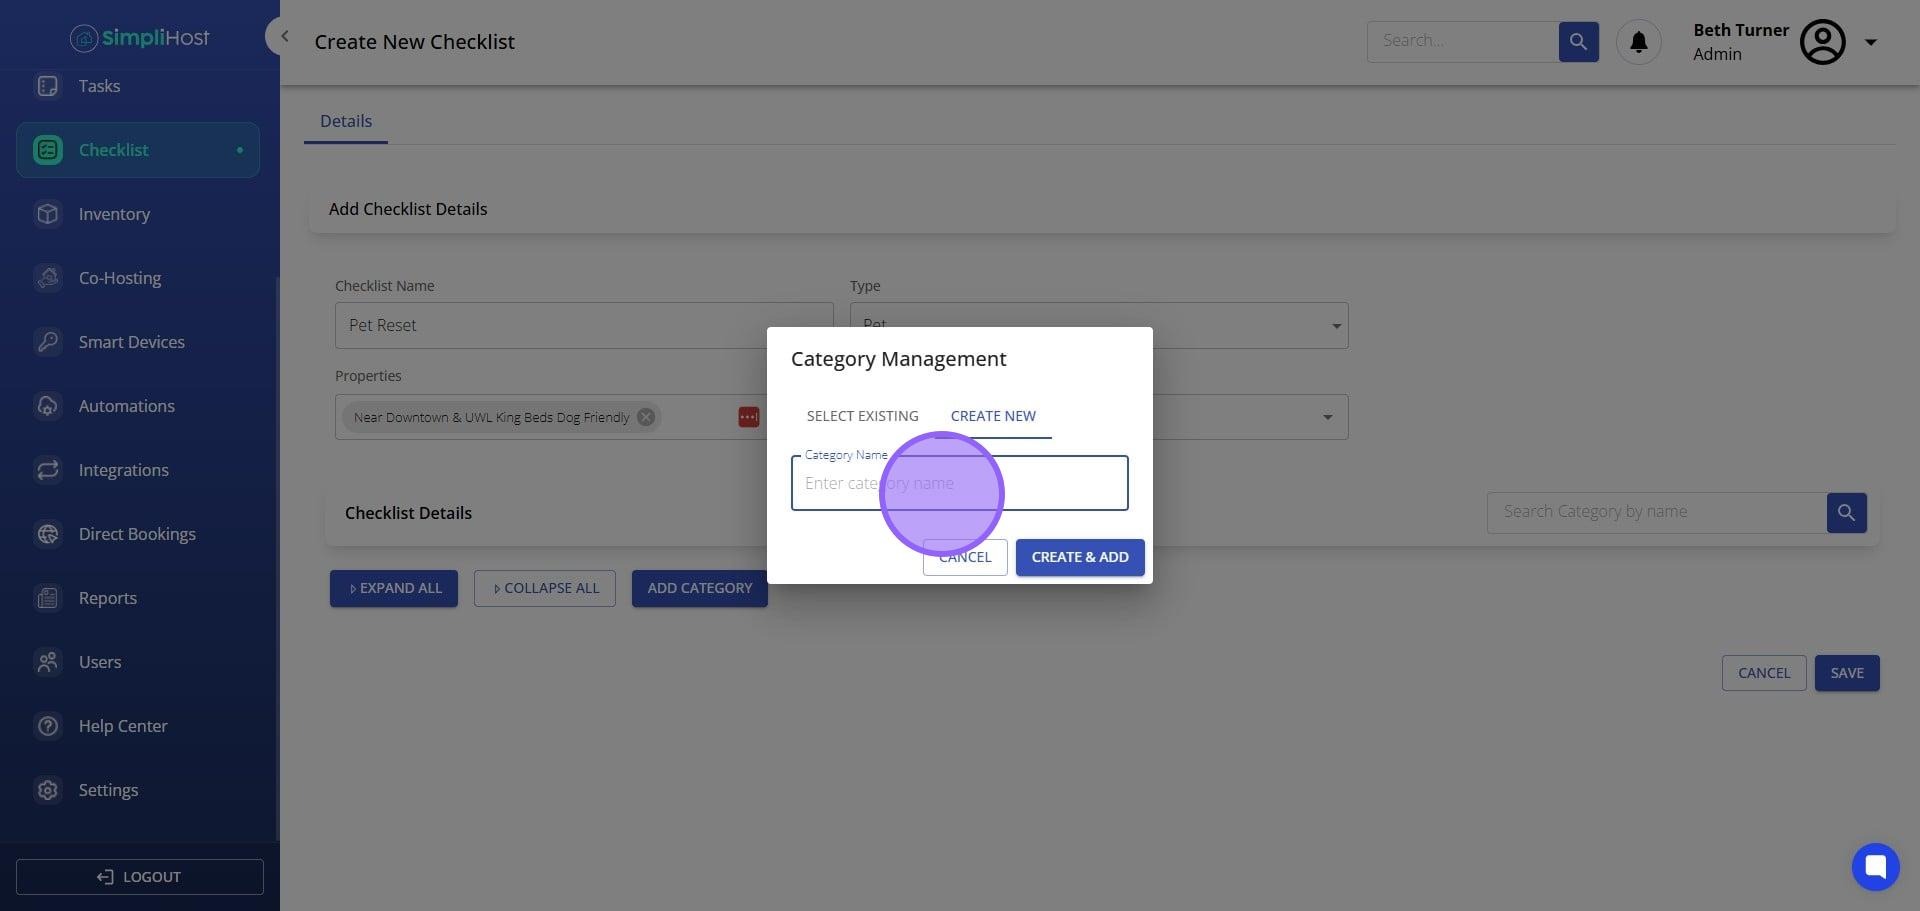
Type the category name and click Create and Add
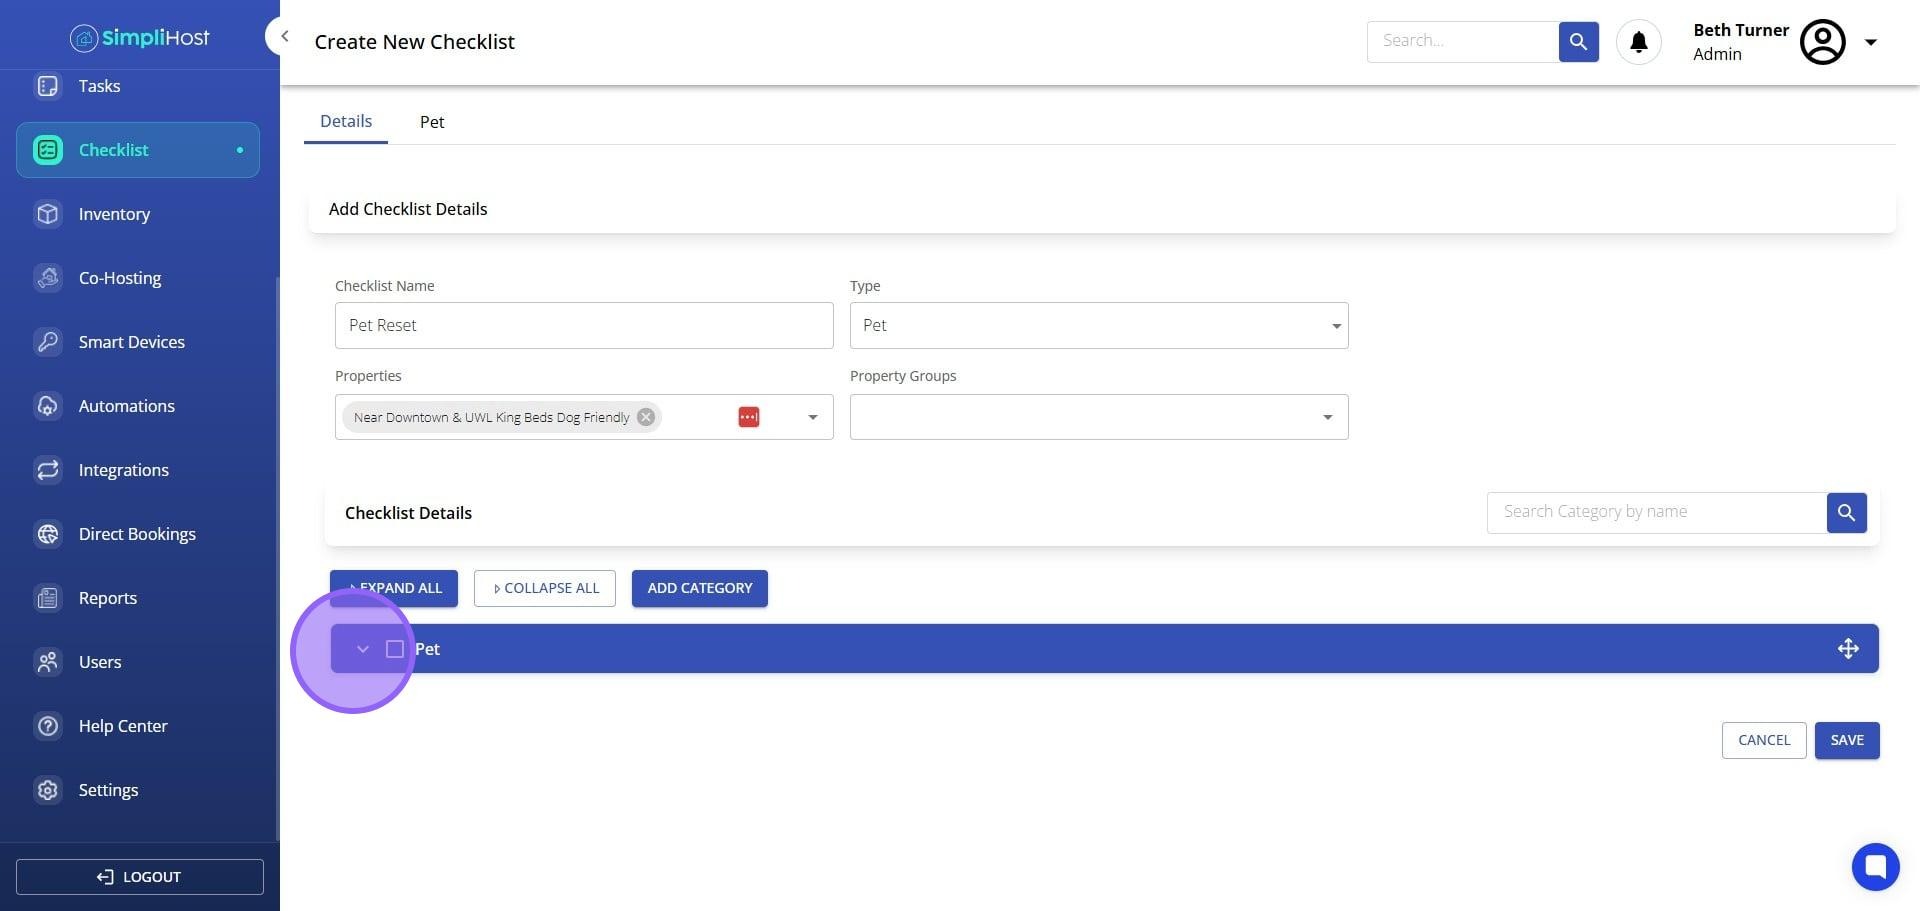
Expand any category to begin adding items to it.
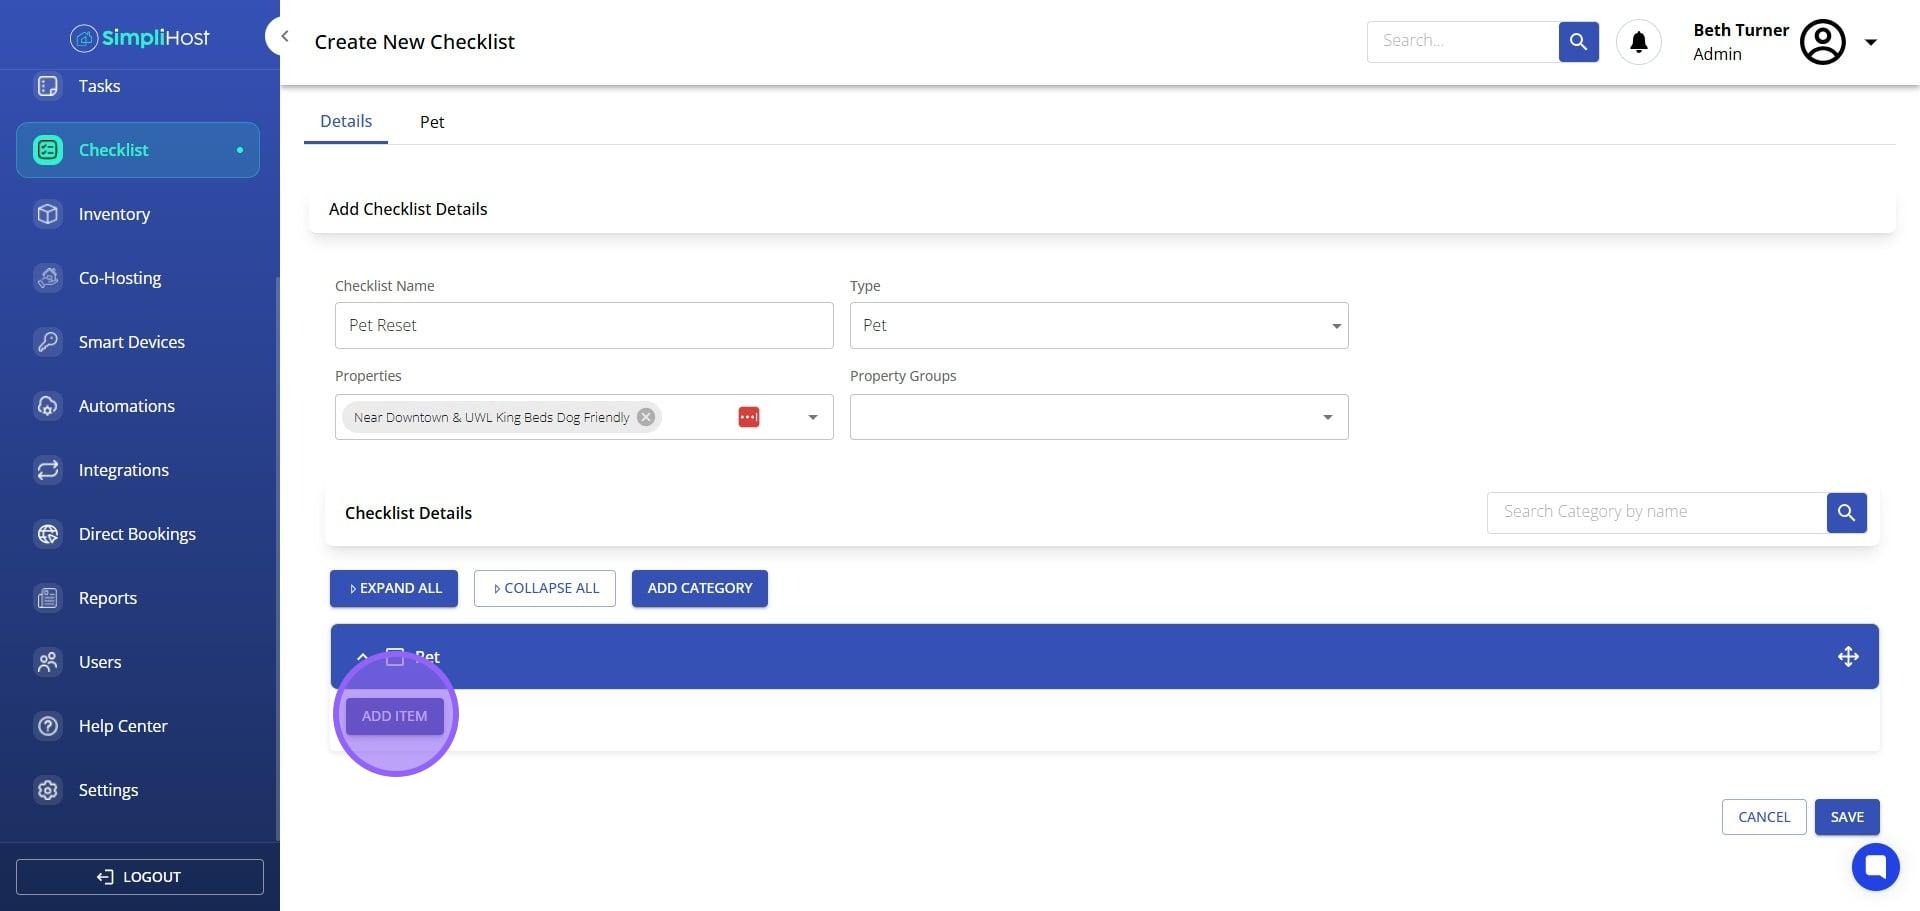
Click Add Item inside the category.
Enter the item name.
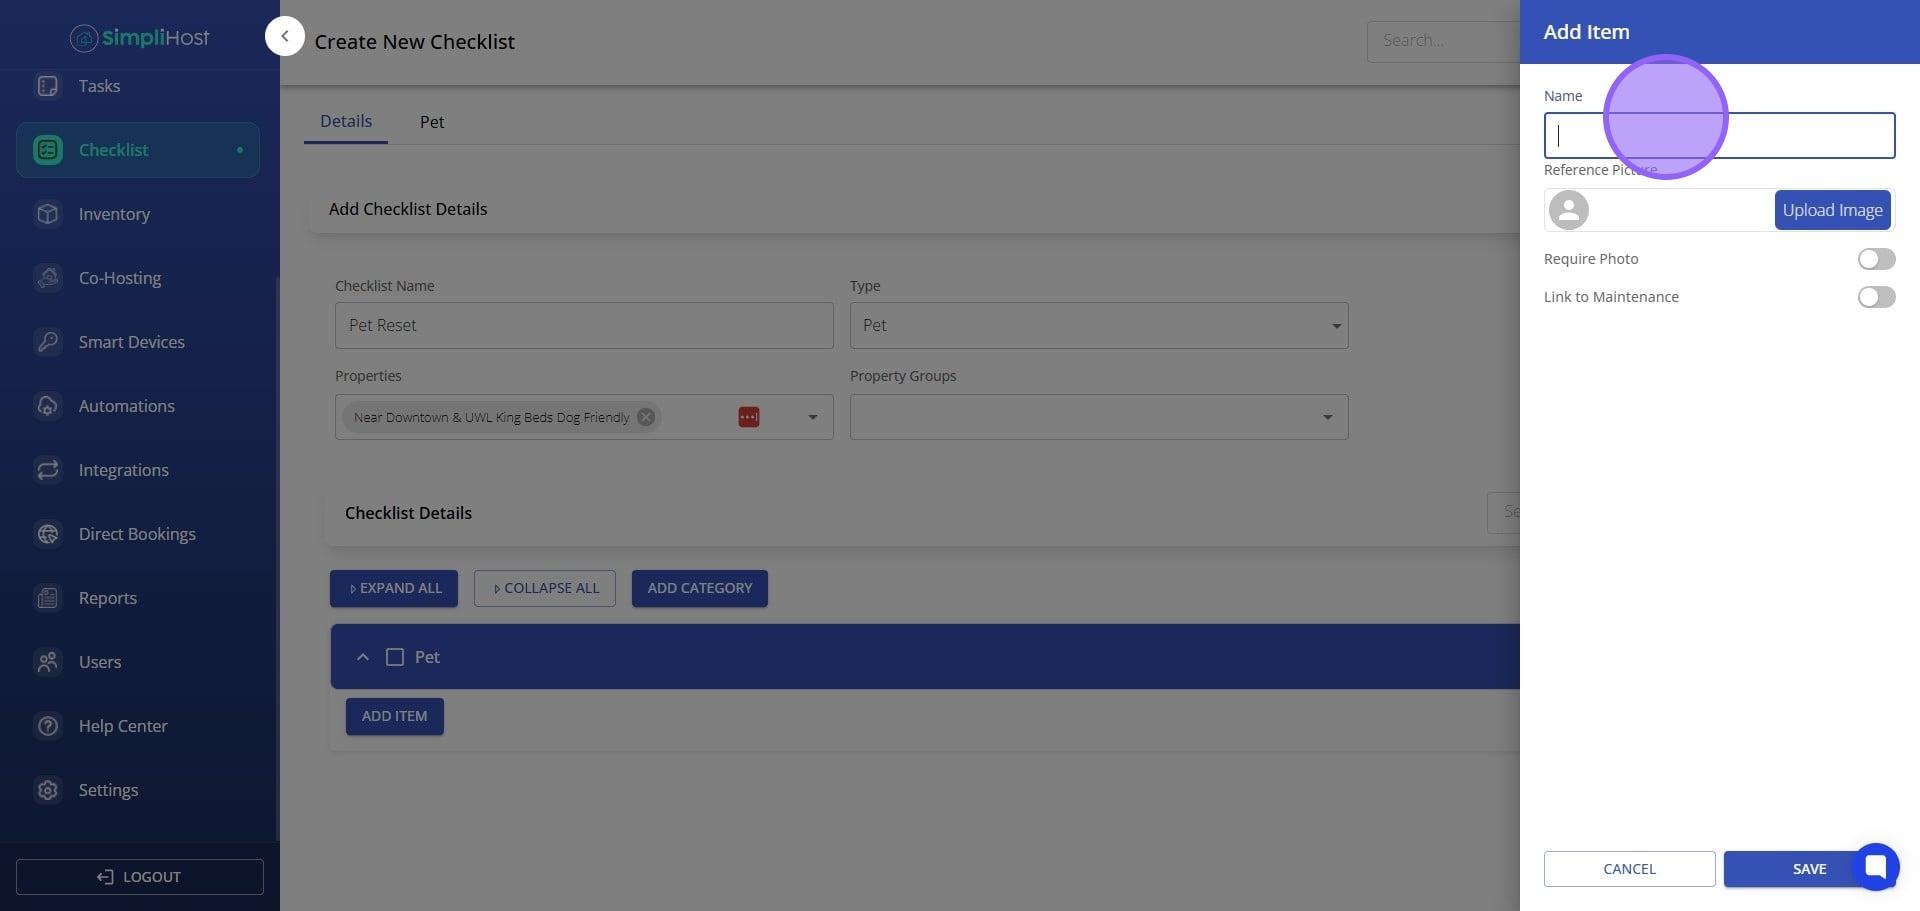
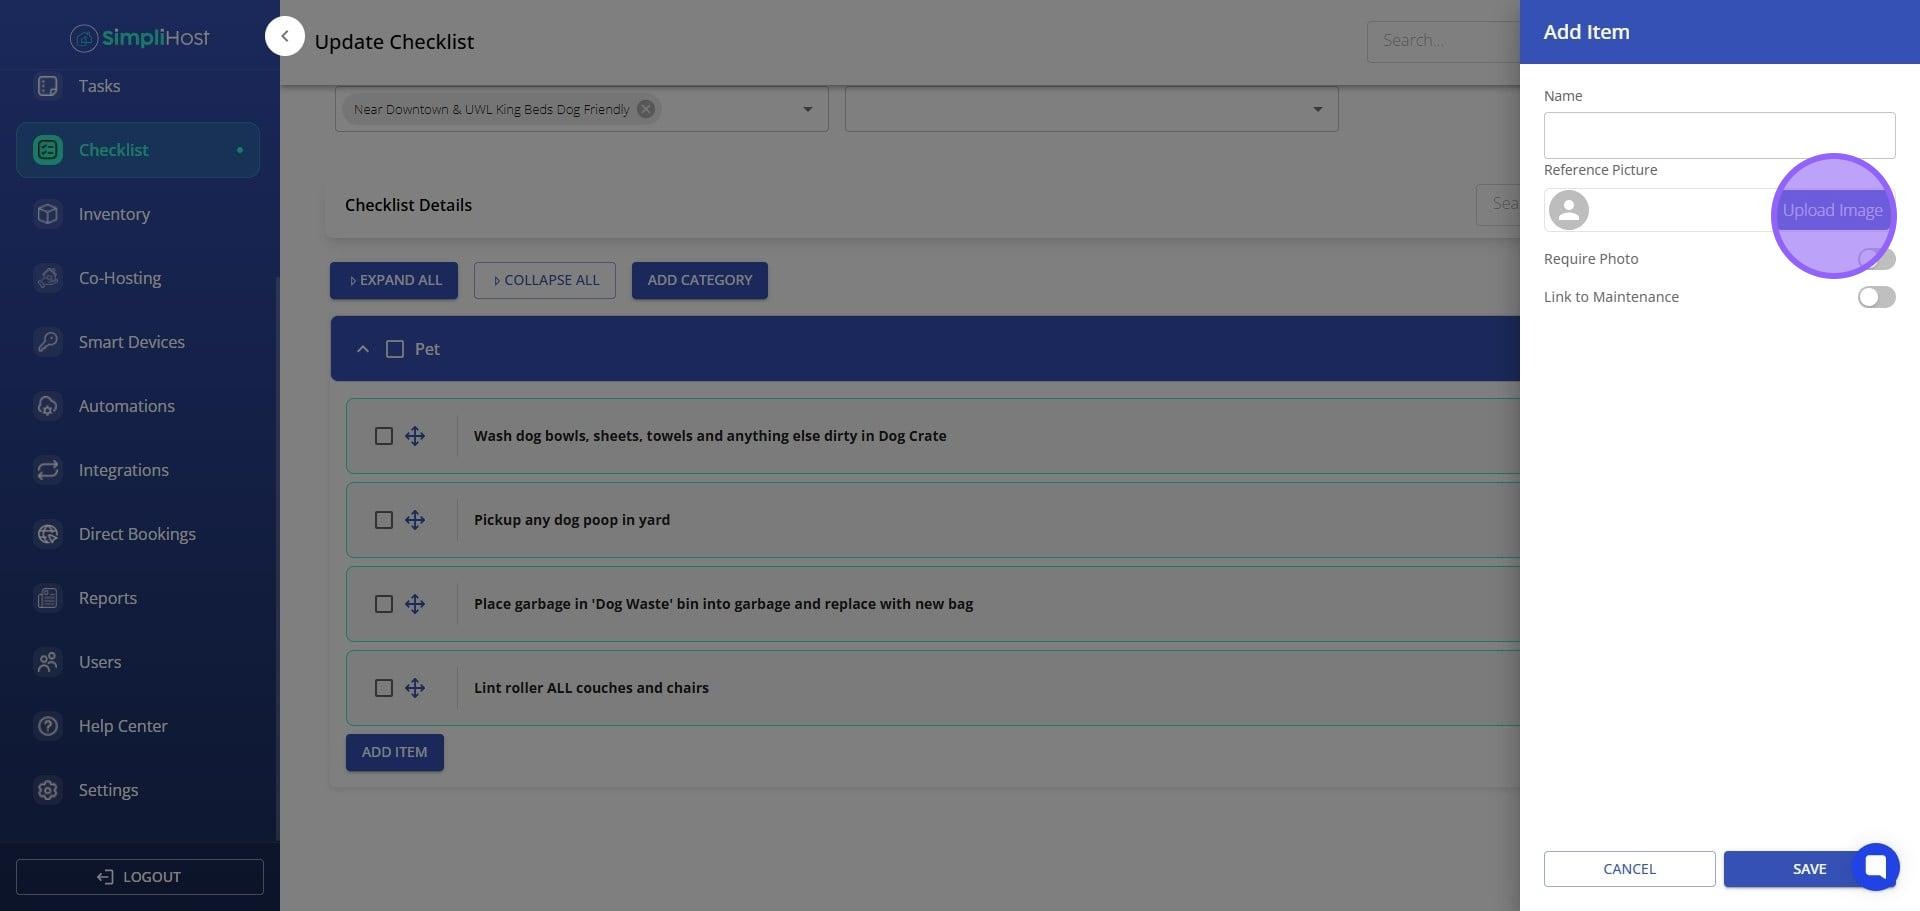
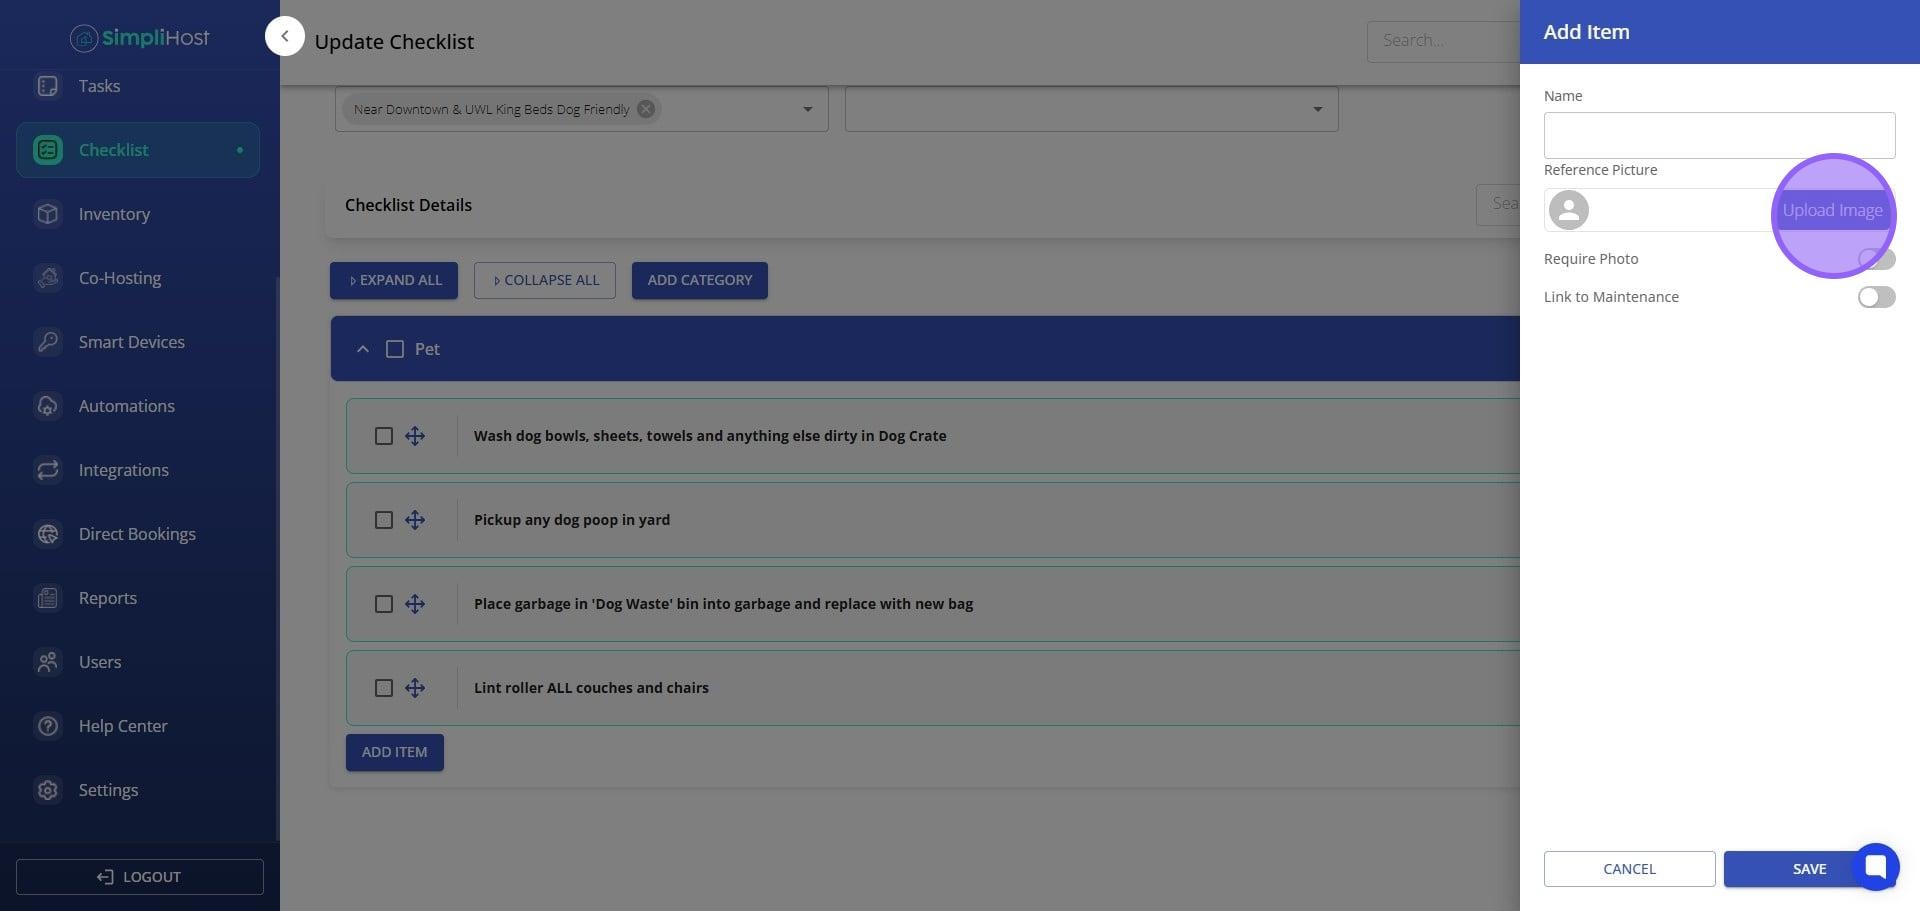
To display a reference photo while the checklist is being completed, click Upload Image and select the appropriate image file. Reference photos are especially useful for cleaning and inspection checklists where visual standards matter.
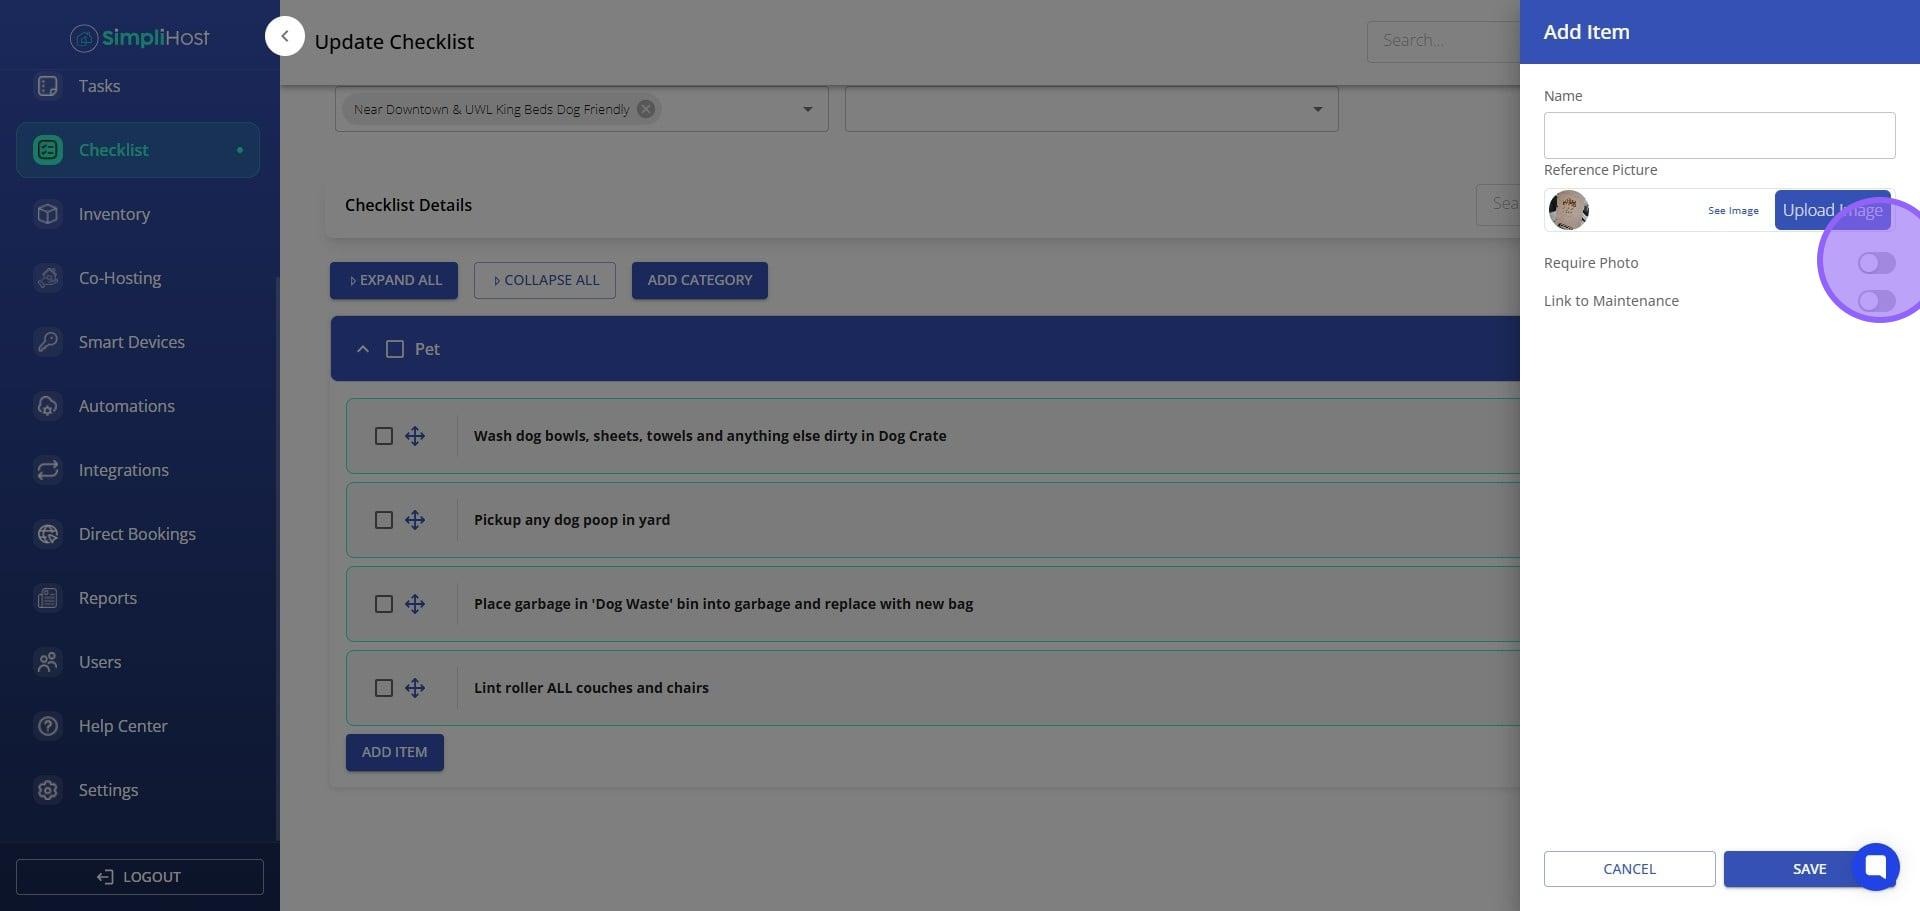
To require the user to take a photo before marking this item complete, toggle on Require Photo.
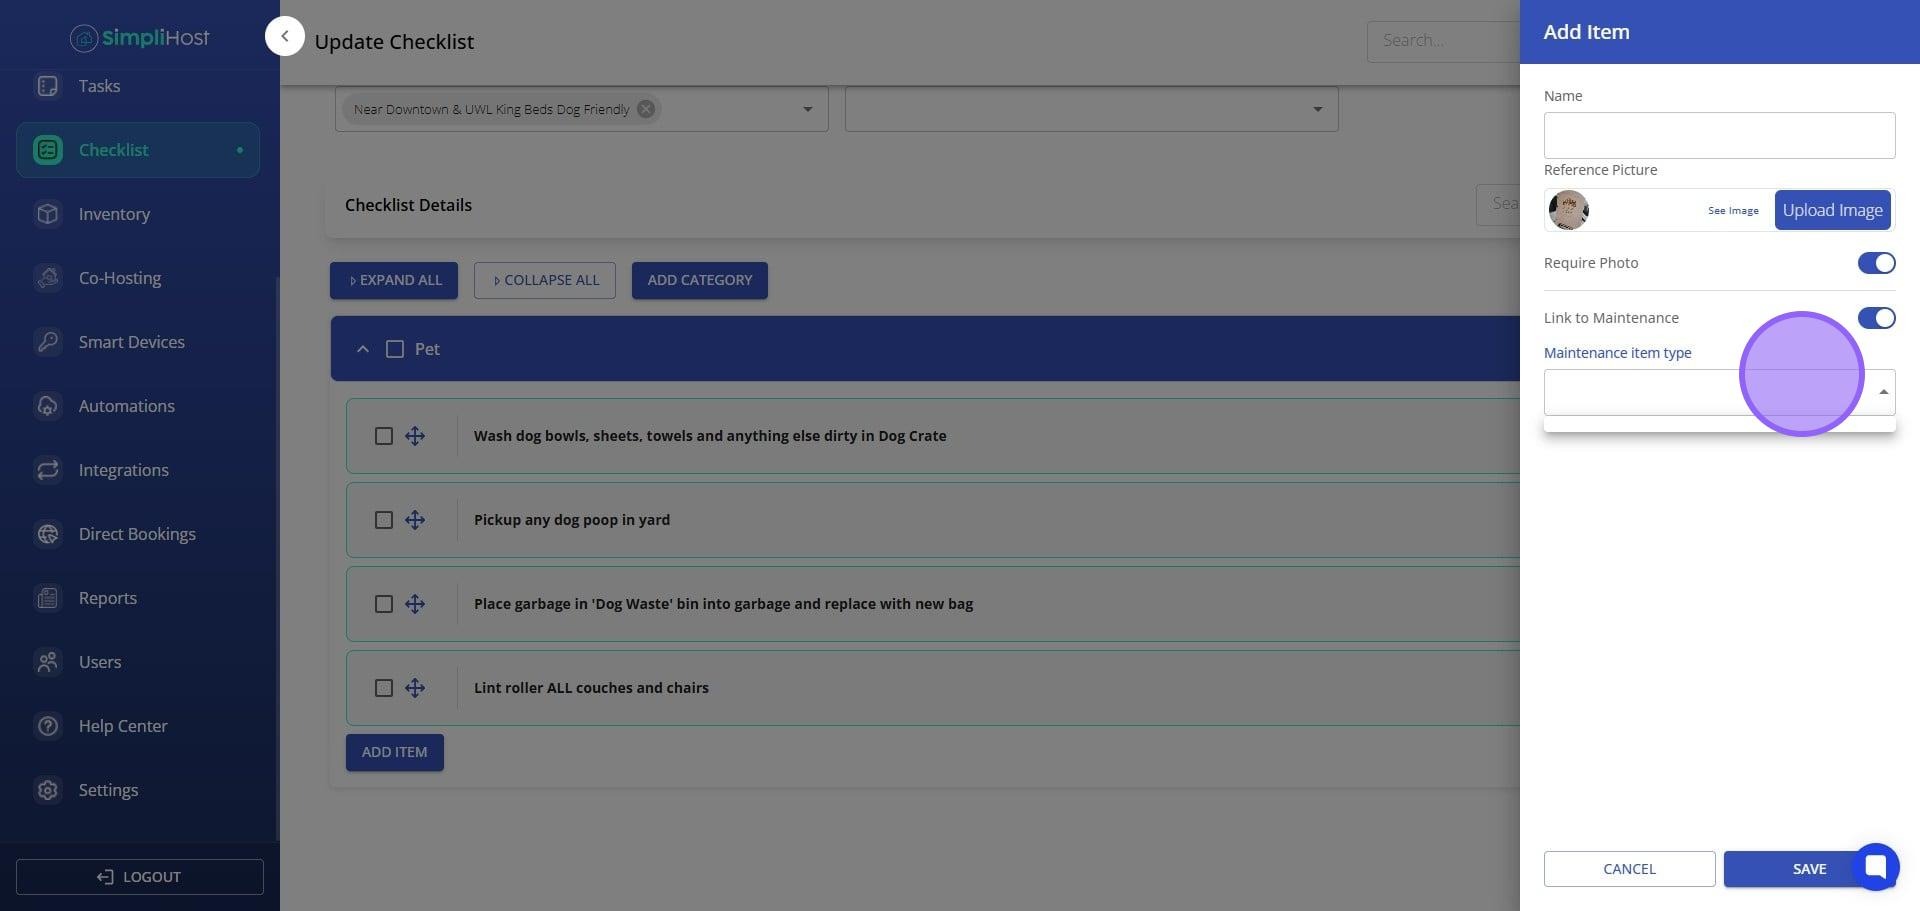
To link this item to a maintenance record so that completing this item updates the maintenance item's completed date, toggle on Link to Maintenance and select the appropriate maintenance item.
Click Save to save the item.
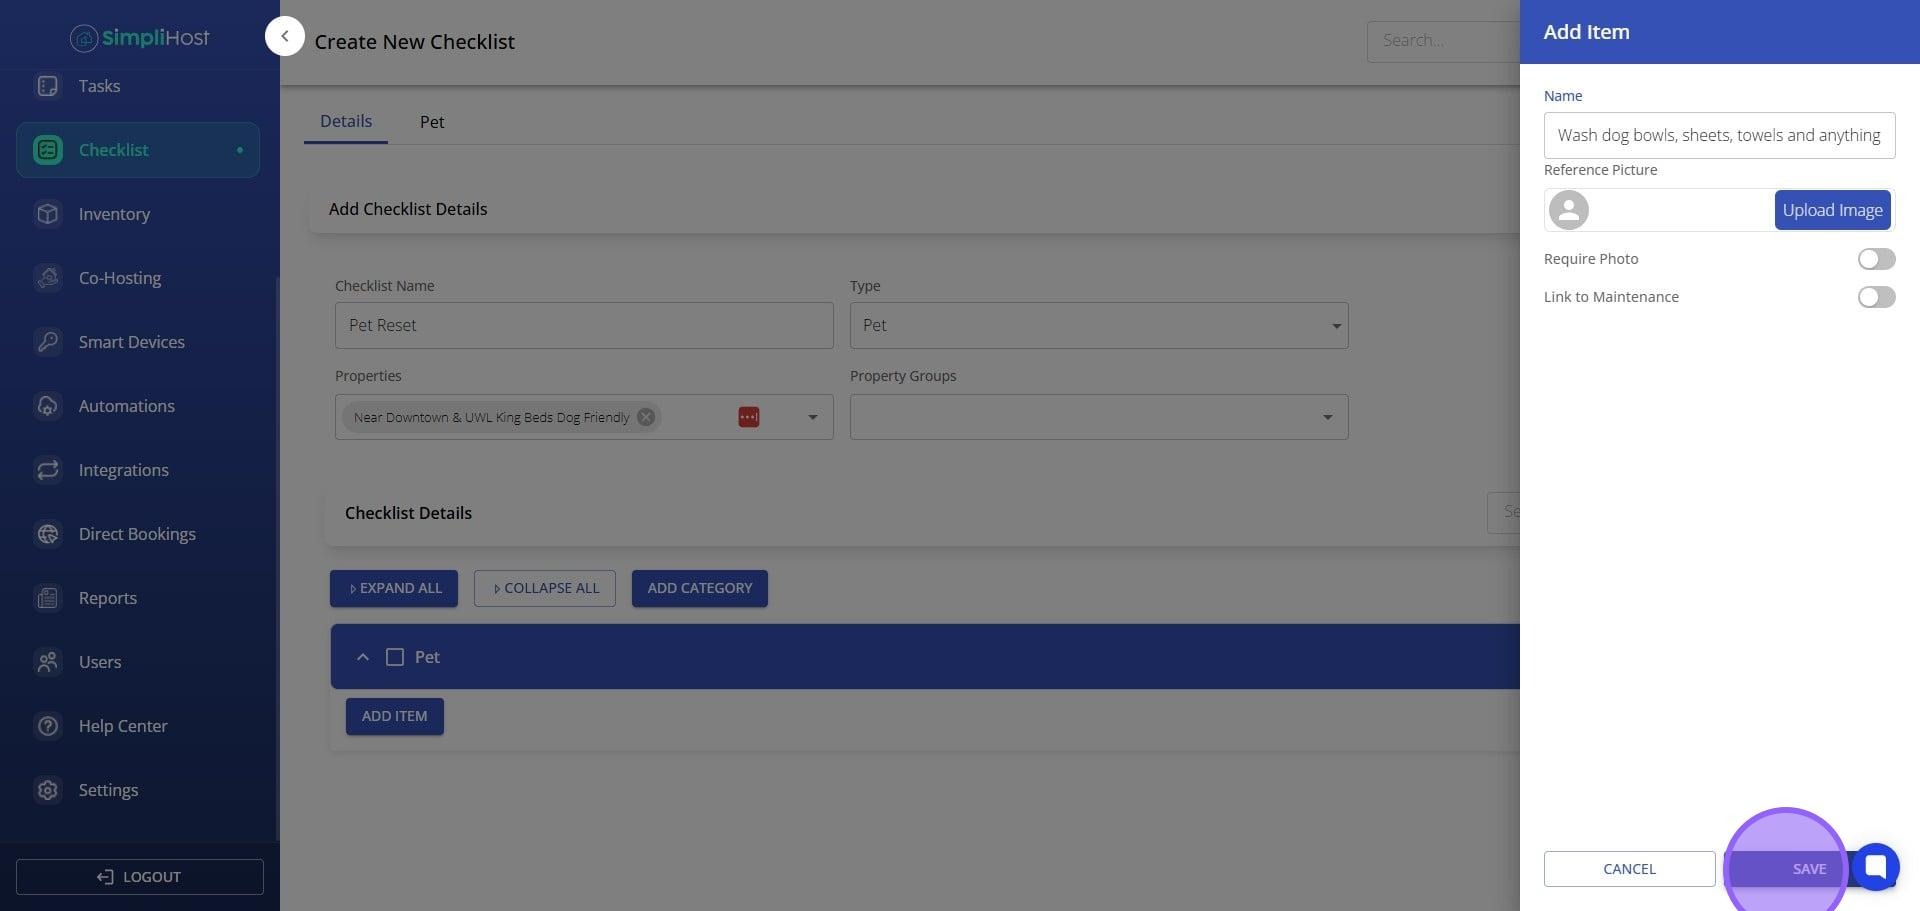
Repeat steps 10 through 15 for all additional items within a category. Repeat steps 6 through 8 to add additional categories.
Click Save to save the checklist.
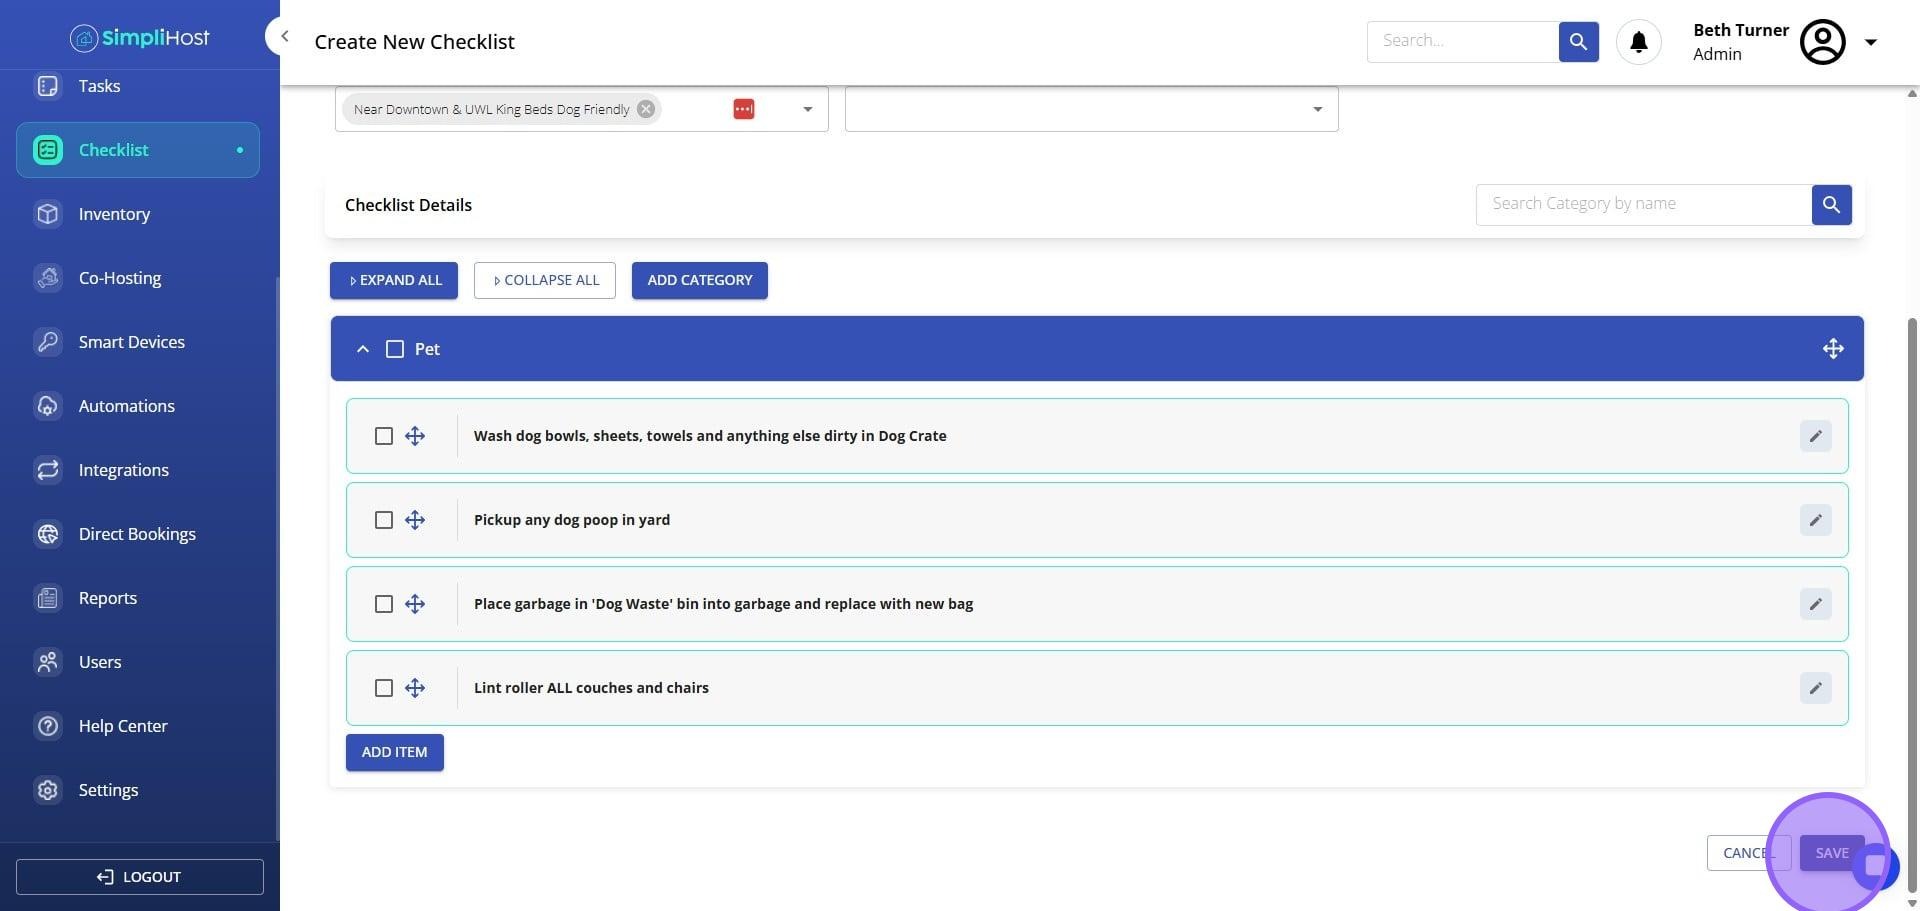
Your checklist is now active and available to assign. It will appear in your checklists list and be accessible to the properties or property groups you selected. Team members assigned to those properties will see the checklist with all items, categories, reference photos, and any photo or maintenance requirements you configured. If you linked items to maintenance records, those records will update automatically when the corresponding checklist item is completed during a job.
Name your checklist clearly so team members can identify it at a glance, for example "Full Turnover Clean" or "Monthly Inspection"
Group related items under the same category to reduce scrolling and keep the checklist easy to follow in the field
Use reference photos for items where visual standards vary, such as how a bed should be staged or where a specific cleaning product should be applied
Enable Require Photo only for high-priority items where proof of completion matters. Requiring it for every item can slow down your team
Link checklist items to maintenance when recurring tasks like filter changes or pest treatments need a tracked completion date
Review your checklists periodically and update categories or items as your property standards evolve
Problem: The checklist does not appear for the assigned property.
Likely Cause: The property was not selected during setup, or a property group was used but the property is not part of that group.
Fix: Open the checklist, confirm the correct properties or groups are selected, and save again.
Problem: A category I need does not appear in the existing list.
Likely Cause: The category has not been created yet.
Fix: Select Create New during the Add Category step, enter the name, and click Create and Add.
Problem: The Require Photo toggle is not saving.
Likely Cause: The item was not saved after the toggle was turned on.
Fix: Toggle on Require Photo, then click Save before moving to the next item.
Problem: The Link to Maintenance option does not show any maintenance items to select.
Likely Cause: No maintenance items have been created for the property this checklist is assigned to.
Fix: Add the maintenance item to the property first, then return to the checklist to complete the link.
Problem: An uploaded reference image does not appear when a team member opens the checklist.
Likely Cause: The image may not have fully uploaded before the item was saved, or the file format is not supported.
Fix: Reopen the item, re-upload the image, and save. Use standard image formats such as JPG or PNG.
Problem: Completing a checklist item is not updating the linked maintenance record.
Likely Cause: The Link to Maintenance toggle was enabled but a specific maintenance item was not selected.
Fix: Open the checklist item, confirm a maintenance item is selected in the Link to Maintenance field, and save.
Manage Property Groups
Create and Track Maintenance Items
Still need help? No worries — just open the in-app chat anywhere in SimpliHost and we'll give you a hand.